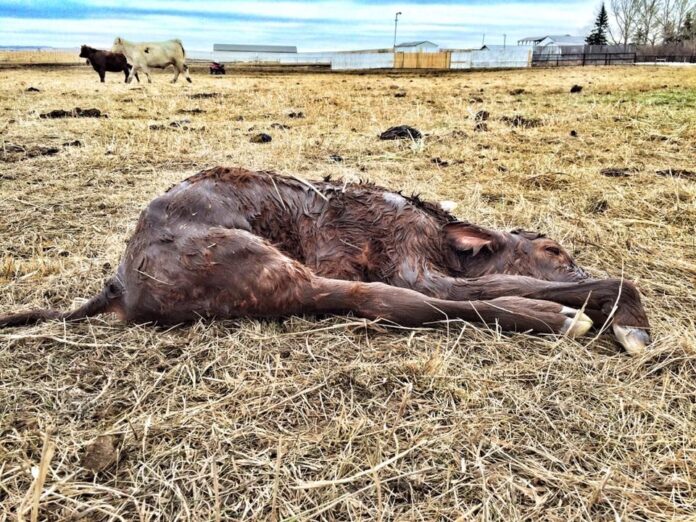
The Calf Recovery Position
As per professional veterinary advice, the calf recovery position, poking the nasal septum with a blade of straw, rubbing the calf vigorously or pouring a small quantity of cold water into a calf’s ear are among the most widely recommended resuscitation techniques.
In a previous article on That’s Farming, we outlined why hanging calves on gates or swinging them by their hind legs can “actually do more harm than good”, which is why vets strongly advise against such practices.
Find out more about the dangers and possible implications of these practices, which some people have previously believed clear animal’s airways, in this news article.
So what is the aforementioned calf recovery position?
Social media users may be familiar with an image of a calf in the recovery position that renowned vet, Dr Cody Creelman, has widely shared across his digital platforms.
The calf recovery position, which is underpinned by proven research, has been shown to allow the calf “the best opportunity to breathe”.
But practices such as swinging calves by their hindlegs or hanging them over gates have been shown to do the exact opposite – by compressing the lungs and making breathing more difficult for the newborn.
According to Dr Creelman, the calf recovery position “allows for maximal oxygen perfusion of both lungs ad opens the upper airway”.
How to: The calf recovery position:
- Sit the calf upright;
- Put the calf on its chest – Allows both of those lungs equal opportunity to expand and fill with air;
- Pull both back legs forward along his/her side towards its ears;
- Stretch front legs out in front of them – ensures the calf is stable and cannot flop back over onto its side;
- You may need to offer some support to weaker calves;
- Take a clean hand to remove any fluid that may be in the calf’s mouth – remove anything that may be in the way of that calf bringing air into the lungs;
- May be necessary to also stimulate breathing by rubbing the calf vigorously, sticking a finger into its ear, pinching its nose, shaking its head gently, inserting a poky blade of straw into its nose or splashing/pouring a small quantity of water into the calf’s ear (large quantities could cause ear infections).
Note: Always seek your vet’s opinion.


